
Costco is selling a wireless backup camera and display for only $80. The install is fairly easy.
1. Remove a plastic cover to gain access to the tail light wiring. You may want to buy some extra plastic push pins they are never the same after you removed them.
2. Tap into the backup light wires for power to the camera. Black is ground and black/pink is the active power lead for the reversing lights. I soldered the wires and covered them with OEM type sheathing to make it appear OEM (as Shadowman would say). You may choose to use the wire taps provided (U-Haul, style) if you wish.
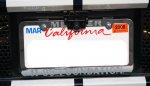
3. The camera sticks onto the back side of license plate with double stick tape provided
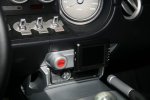
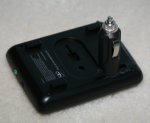
4. Saw then glue the power plug to the rear of the display (I used black epoxy). Drill two holes in the back side of the display case, then run the power leads into the unit and solder them to the appropriate pads. Then the display/plug unit becomes one and is a good mounting location without any modifications to the car.
1. Remove a plastic cover to gain access to the tail light wiring. You may want to buy some extra plastic push pins they are never the same after you removed them.
2. Tap into the backup light wires for power to the camera. Black is ground and black/pink is the active power lead for the reversing lights. I soldered the wires and covered them with OEM type sheathing to make it appear OEM (as Shadowman would say). You may choose to use the wire taps provided (U-Haul, style) if you wish.
3. The camera sticks onto the back side of license plate with double stick tape provided
4. Saw then glue the power plug to the rear of the display (I used black epoxy). Drill two holes in the back side of the display case, then run the power leads into the unit and solder them to the appropriate pads. Then the display/plug unit becomes one and is a good mounting location without any modifications to the car.
Attachments
Last edited: