Tailamp Removal Help


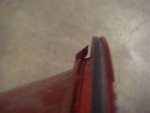
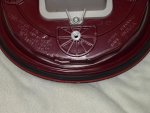
The above suggestions all sound like good alternatives. I'll be the first one to admit I'm completely not a handyman-type. However, the way Ford designed this set up seems "goofy"; it makes no sense to be forced to replace the entire tail light assembly because the plastic screw-posts are stripped! And, I don't think Ford did it for parts sales either because the GTs aren't exactly produced in large number.

Ed
 
Last edited:
Looks like a market for taillight service ! hehehehe

------

One other possible fix comes to mind.....

----

High strength Velcro, the hard plastic hook/loop type, not the soft pile type, on self self adhesive tape.

If there is enough of a flat surface in the base of the tail light bucket, it could be velcro'ed in ....

Ive used this stuff to attach a license plate, without drilling holes in my bimper cover....

------

This can be found at your local megaMart in the hardware section. Look for the Industrial or high strength products with self adhesive tape.
 
Does that tab on the top have give with the downward pressure applied to it or is the downward pressure applied to the complete unit ?
 
Does that tab on the top have give with the downward pressure applied to it or is the downward pressure applied to the complete unit ?

Once the three studs are in postion the tab allows the lamp to snap in postion at the top with it wedging itself into the edge of the rear fascia.

FYI the tab is not flexible

Takes care

Shadowman
 

Attachments

  • DSC04147.JPG
    DSC04147.JPG
    25.8 KB · Views: 168
Moved to da tech section.
 
here is a photo of an experiment i tried that i think someone on here had suggested - i cut off old stud with bad threads, drilled correct hole for this
size rivnut (10-24) and installed using rivnut tool - i then screwed in an
allen head screwed and tried tightnening very very tight to see if the rivnut would spin and it did not !! so this may be a solution for tail lights that the studs have been ruined from removal - i did not take the time to make a "jig" so that the three holes would be in exact position however that would not be difficult as i was just experimenting - now i need to see if drilling through the other two locations would damage anything inside the light - as it appears this one did not - anyway just thought i would pass it along

steve
 

Attachments

  • P3120051-gt.jpg
    P3120051-gt.jpg
    108.4 KB · Views: 133
here is a photo of an experiment i tried that i think someone on here had suggested - i cut off old stud with bad threads, drilled correct hole for this
size rivnut (10-24) and installed using rivnut tool - i then screwed in an
allen head screwed and tried tightnening very very tight to see if the rivnut would spin and it did not !! so this may be a solution for tail lights that the studs have been ruined from removal - i did not take the time to make a "jig" so that the three holes would be in exact position however that would not be difficult as i was just experimenting - now i need to see if drilling through the other two locations would damage anything inside the light - as it appears this one did not - anyway just thought i would pass it along

steve

Good job Steve

The location of the leds and the reflector is close to the back of the light so it will be nice to know if all three areas can be dealt with in this manner and in doing so exactly how deep one can go; when time permits can you put a probe in the hole and establish a clear depth measurement?

How did you get the debris out or did you drill it upside down; LOL?

Takes care

Shadowman
 
well now that you mention it i assume there is a bit of debris somewhere in there !! anyway i will drill the other two out and check depth and report back !!
 
well now that you mention it i assume there is a bit of debris somewhere in there !! anyway i will drill the other two out and check depth and report back !!

Thank you both personally and on behalf of the Forum

All the best

Shadowman
 
the riv-nut looks good. hope it works well.more picks of the project please!
 
Since we're doing all this work on the tail light. Does anyone know how the failed bulb sensor works? One wire from the computer is for the burned out bulb detector and I'd like to know how this circuit works.
 
Don, these taillights are an LED based design. No bulbs or filaments that burn out or by vibration are broken. Failure time should be somewhere around 80+ yr's of daily use....

I have this design on a few of my cars dating back to 2000 and have not seen a problem.

But in all fairness, has anybody had a taillight actually burn out??
 
One of my backup lights is not working - it was noticed it in the garage at Rally III, as I rarely drive the car at night, especially backing up. I'll have it checked out when I get the car out next month.
 
here is a photo of an experiment i tried that i think someone on here had suggested - i cut off old stud with bad threads, drilled correct hole for this
size rivnut (10-24) and installed using rivnut tool - i then screwed in an
allen head screwed and tried tightnening very very tight to see if the rivnut would spin and it did not !! so this may be a solution for tail lights that the studs have been ruined from removal - i did not take the time to make a "jig" so that the three holes would be in exact position however that would not be difficult as i was just experimenting - now i need to see if drilling through the other two locations would damage anything inside the light - as it appears this one did not - anyway just thought i would pass it along

steve
Nice work Steve,looking forward to what you come up with regarding the other two holes and the debris.Joe
 
One of my backup lights is not working - it was noticed it in the garage at Rally III, as I rarely drive the car at night, especially backing up. I'll have it checked out when I get the car out next month.

The back up light bulb is easy to replace; no need to remove the tail light assembly; simply remove the three small Torx and the white shell will come off to replace it.

It is the only traditional bulb within the assembly.

Takes care

Shadowman
 
Thank you :thumbsup
 
These state of art LED lights have a center "standard" white light bulb for reverse?

Ralphie look at it this way - you don't have to take them out now :thumbsup
 
These state of art LED lights have a center "standard" white light bulb for reverse?

Ralphie look at it this way - you don't have to take them out now :thumbsup

Yes sir and you are correct

Shadowman
 
Since we're doing all this work on the tail light. Does anyone know how the failed bulb sensor works? One wire from the computer is for the burned out bulb detector and I'd like to know how this circuit works.

OK...who actually knows the answer? The wiring book shows a burned out bulb detector as part of the tail lamp assembly. I'd just like to know how it works. Maybe there are resistors incorporated in the led strings and a voltage is picked off ... hi...or low .. that the computer reads and causes a different flash rate?

Pin C on the plug is the detector output. WTFO?

Can I hook up regular bulbs to the stop circuit with out problems? Like in a trailer harness?
 
Contact the trailer king, Dave Baron.