DIY Door Panel Removal / Side Mirror Removal


Specracer

GT Owner
Mark IV Lifetime
Nov 28, 2005
7,231
MA
I asked a lot of people if they had taken off their mirrors to avoid a seam of clear film around their mirrors. No one I asked had done this yet. I wanted to avoid this if possible. Having now done this to both cars, I would say the new car is easier (there are no X-mas fasteners to wrestle with, or vapor barrier to try to remove with out damage), once you get over the mental hurdle of thinking that your going to break something.

Blue tape is your friend, other tools are plastic interior tools, torx drivers, 10mm deep socket.

1. Roll up the window, or you will have to reconnect the lower panel to get the window back up (as me how I know). Also you will see in the pictures, I have the upper panels off (there are 2) on the 1st door I thought these needed to come off, they don’t, to get the mirrors off. I however elected to take off the other side, as I’m having tint applied, and I thought it would keep these panels safe from application fluids, knives etc.

IMG_9252.jpg

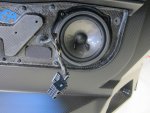
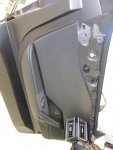
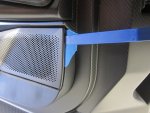
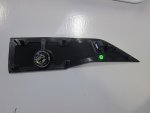
2. I started with the speaker grill. There are 6 clips. Disconnect the door lock, and tweeter. Picture of the back side. I only used the tool to get the 1st 2 clips, Aster I used my hands, as the inside of the grill is foam, I didn’t want the tool to tear the foam.
IMG_9253.jpg
IMG_9254.jpg

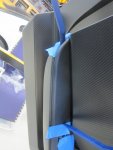
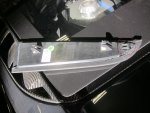
3. Elbow pad, this would be frustrating if the trick isn’t known. At the back, you need to raise the edge, that frees a tab, that then allows the pad to slide backwards. Circle shows this tab. This must come off, as it conceals 2 screws to remove the lower door panel.
IMG_9255.jpg
IMG_9256.jpg
 
Last edited:
4 Remove arm rest, ~6 torx screws, not pictured, but its the largest piece. Disconnect harness (lock tab is of course on the underside, unable to be seen, but you can feel it). It’s the larger harness coming out of the door just aft of the woofer.

IMG_9257.jpg

5 Remove woofer, 4 torx

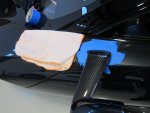
6. Tape off around the base of the mirror, also note the towel, be sure you have something in this location. I found that I had to set the mirror down here, to route the connector through the door, as it got hung up when pulling wires from above. A second set of hands would work, also, but I was alone.

IMG_9259.jpg

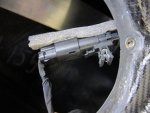
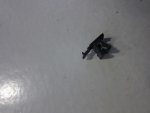
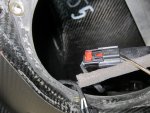
7. Free the connector inside the door, paying attention to the location it clips to. Note what the clip looks like, you just pull and it comes off it’s mouthing location to the door. You will see there is foam for rattling. I peeled this back, in hindsight, I would cut it where the connector comes apart. This connector has 2 locks, the red tab that slides back, and a lock tab that's recessed, I used a small screw driver to release the tab. Last trick for this connector, remove the clip that attaches the connector to the door. If you don’t, the connector wont fit through the hole in the top of the door (again, ask me how I know). Pay attention to wire routing, around the window tracks, as you don’t want issues with window operation after re installation.

IMG_9260.jpg
IMG_9261.jpg
IMG_9262.jpg
 
Last edited:
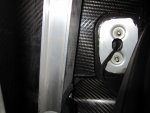
8. Last step, 2 10mm nuts that hold the mirrors on. Remove these and the mirror is free. One mirror came off easy, the second, I did have to pull / rock pretty hard, there is a friction fit of the mirror to the door. There was a loose CF spacer under the mirror. You will need ¼” drive to get in there. I had a rotating head ratchet I found helpful. You wont be able to see this area, this is the camera inside the door looking up at the base of the mirror.

IMG_9263.jpg

9 Optional, I put the lower panel back on, to have the window and door opening button functional. Leaving the woofer out and other trim off.

Hope this is helpful.
 
Last edited:
  • Like
Reactions: 68Rcodeman
Wow!

Ed
 
Nice how to, will need this in the future. thanks for posting.
 
My head is spinning


Sent from my iPhone using Tapatalk
 
Cool! Thanks for taking the time to share.

It used to be that you had to go to a specialist to get a spray in bed liner, now it's a factory option. It would seem that PPF is a must, given the aero of the GT. PPF as a factory option would be a bonus!
 
Great post Andy. Thanks for taking the time to share this information.
 
Great post Andy. Thanks for taking the time to share this information.


What he said, great work!

Thanks!
 
Still think you're crazy for doing this, but well done.

Vince H
 
  • Like
Reactions: Apollo
Always giving and sharing your knowledge.
Dang, Andy, how long until the DIY Specracer N&FGT owners’ manual is released?
 
Nice how to, will need this in the future. thanks for posting.

+1
 
This should be the first sticky in the NGT Tech Forum.
 
Andy -- "you are the Master "
I can't imagine ever doing that on my car.

andy (ajb)
 
Thanks, it's really good to see truly useful posts starting now more cars are out there!
 
Still think you're crazy for doing this, but well done.

Vince H

I was thinking the same thing!
 
Now looking forward to putting it back together, another step close tor finally driving it.
 
Do they remove any panels to install the wrap?
 
When I had mine wrapped, zero panels were removed. But I will have the small seam Andy was referring to at the door mirrors. Also, I did not wrap the center portion of the rear fascia nor ANY of the underbelly parts.
Andy (ajb)
 
All I can say is I’m so glad that I have a good friend name ANDY who lives not too far for me!
it pays to have friends