- Aug 25, 2006
- 4,436
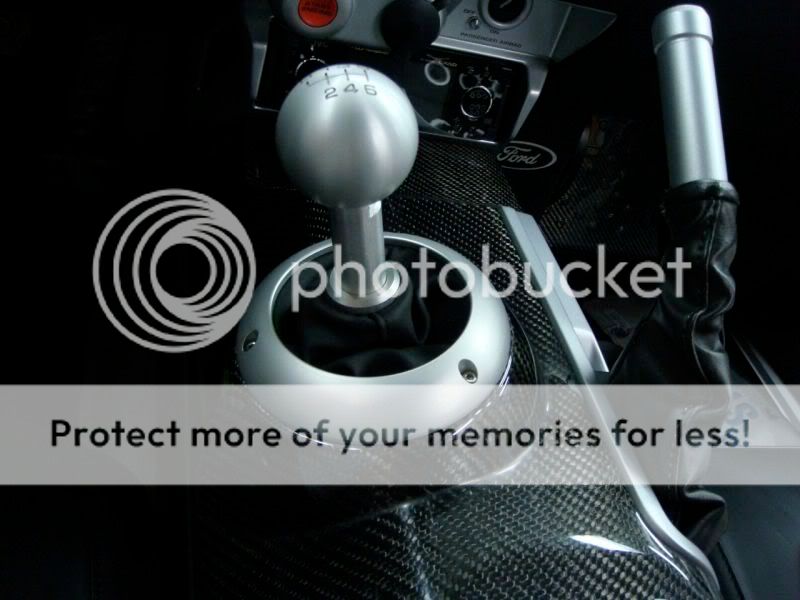
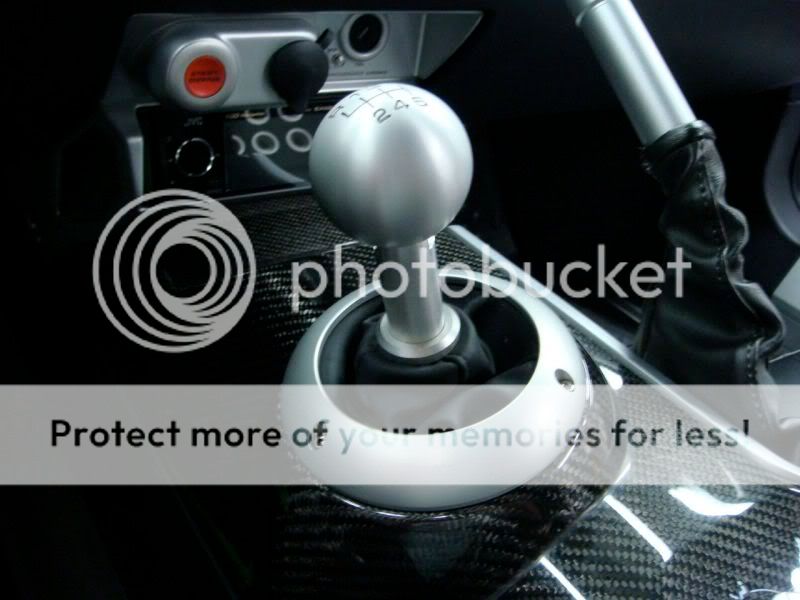
Let me begin by saying that for those of you that have the custom shifter bezel/boot and e-brake cover on the way; you will be happy.
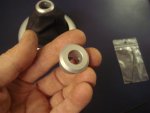
After waiting all day for the care package to arrive so I could finally hold and integrate one of the first run pieces the moment finally arrived very late in the day however quickly the parcel was opened and what I saw was as excepted; stunning.
I promptly tended to the integration of the two new pieces beginning with the custom shifter bezel/boot. I followed the instruction s as presented to all and discussed between Andrew and myself and for the most part all went smoothly however;
On this particular gal that incidentally has the Ford Racing short shifter I had to pull back the Velcro’d in place driver side trim panel so that I could loosen the Torx securing the center console so it could be moved ever so slightly because the OEM rubber shifter boot was pinched in position. This is because Ford Racing short shifter’s body is taller as such nearly touches the center console. This process was painless and then I proceeded to set the new custom shifter bezel/boot in position; it took me a couple attempts to get the 3 cam locks to remain out of the way while doing so and then in the end I found it easiest if I set it in position and then pulled the shifter arm into the reverse detent position; meaning against the spring load and not actually in reverse and then it slipped right in place. While continuing to hold the shifter in this position I cinched the cam lock near the driver leg and then released the shifter. The reason that this was needed is because the clearance is truly very tight and when the cam lock is in the installation position it was hitting against the shift bell crank however by pulling the shifter into the reverse dent position the bell crank is lowered and then once the cam lock was rotated into position the clearance is perfect. I then proceeded to snug the other two cam locks. Once this process was completed I made certain that she was able to shift through all of her gears with no issues and then proceeded to complete the reassembly process which in this case included the small machined insert for use with the smaller diameter shifter shaft.
Now keep in mind that if you still have your OEM shifter all you will have to do is remove the OEM rubber shifter boot and then set the custom shifter bezel/boot in position and cinch the three cam locks.
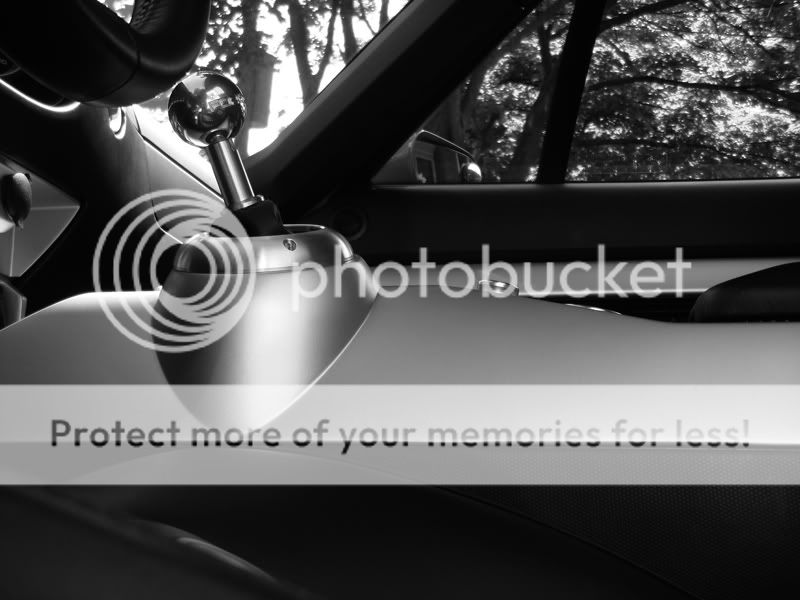
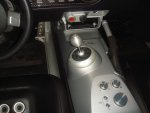
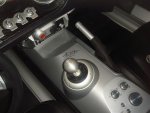
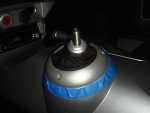
Once the custom shifter bezel/boot is in place the design of the system allow for personal touch height adjusting of the leatherette portion thus allowing a person to decide if they want more or less of the shifter shaft exposed.
It fits perfectly and looks wonderful.
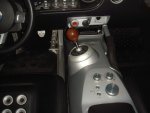
Once the custom shifter bezel/boot integration was completed I then proceeded to install the e-brake cover. Per Andrews recommendation I left the OEM rubber cover in place and installed the new one over it which results in a crisper look.
Initially I removed the e-brake trim and set it aside; now Andrew and I discussed this and he shared that it can be installed without doing so however IMO having the trim removed allowed me much more flexibility when it came to fitting the e-brake cover into position. If you elect to remove the e-brake trim be certain to blue tape the perimeter of the center console and then by placing your fingers within the e-brake bezel at the narrow rear opening you can gently begin the process of lifting it out; BTW it does come straight up even though it would appear that it should do so on an angle and once it begins to lift at the first corner them move to another corner and after massaging it corner by corner it will then slip right out. Installation of it is very easy however making certain that all of the small metal clips are firmly in place.
Prior to beginning the installation of the new e-brake cover per Andrew I rolled the small end over itself and then trimmed the little fold of material within the small end after which I used a bit of silicon spray on the e-brake cover and on the e-brake handle which allowed it to slip on very easy. Now because it is an upholstered piece that has yet to relax it took a few minutes working it over the OEM rubber e-brake cover until I was happy with the look.
Take your time and you will end up with a very crisp looking setup.
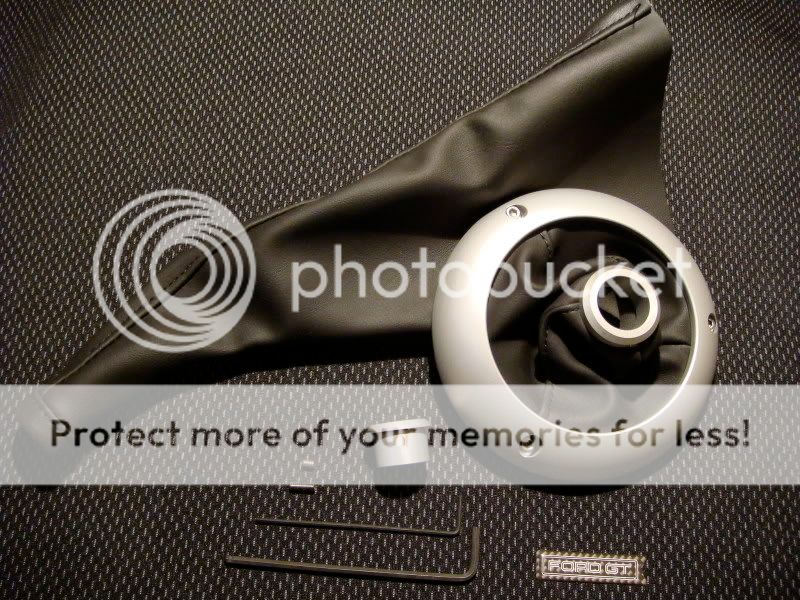
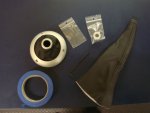
Here are a few pictures of the systems as received as well as them integrated in this gal.
If there are any questions please let me know as I remain available to assist.
Takes care
Shadowman
After waiting all day for the care package to arrive so I could finally hold and integrate one of the first run pieces the moment finally arrived very late in the day however quickly the parcel was opened and what I saw was as excepted; stunning.
I promptly tended to the integration of the two new pieces beginning with the custom shifter bezel/boot. I followed the instruction s as presented to all and discussed between Andrew and myself and for the most part all went smoothly however;
On this particular gal that incidentally has the Ford Racing short shifter I had to pull back the Velcro’d in place driver side trim panel so that I could loosen the Torx securing the center console so it could be moved ever so slightly because the OEM rubber shifter boot was pinched in position. This is because Ford Racing short shifter’s body is taller as such nearly touches the center console. This process was painless and then I proceeded to set the new custom shifter bezel/boot in position; it took me a couple attempts to get the 3 cam locks to remain out of the way while doing so and then in the end I found it easiest if I set it in position and then pulled the shifter arm into the reverse detent position; meaning against the spring load and not actually in reverse and then it slipped right in place. While continuing to hold the shifter in this position I cinched the cam lock near the driver leg and then released the shifter. The reason that this was needed is because the clearance is truly very tight and when the cam lock is in the installation position it was hitting against the shift bell crank however by pulling the shifter into the reverse dent position the bell crank is lowered and then once the cam lock was rotated into position the clearance is perfect. I then proceeded to snug the other two cam locks. Once this process was completed I made certain that she was able to shift through all of her gears with no issues and then proceeded to complete the reassembly process which in this case included the small machined insert for use with the smaller diameter shifter shaft.
Now keep in mind that if you still have your OEM shifter all you will have to do is remove the OEM rubber shifter boot and then set the custom shifter bezel/boot in position and cinch the three cam locks.
Once the custom shifter bezel/boot is in place the design of the system allow for personal touch height adjusting of the leatherette portion thus allowing a person to decide if they want more or less of the shifter shaft exposed.
It fits perfectly and looks wonderful.
Once the custom shifter bezel/boot integration was completed I then proceeded to install the e-brake cover. Per Andrews recommendation I left the OEM rubber cover in place and installed the new one over it which results in a crisper look.
Initially I removed the e-brake trim and set it aside; now Andrew and I discussed this and he shared that it can be installed without doing so however IMO having the trim removed allowed me much more flexibility when it came to fitting the e-brake cover into position. If you elect to remove the e-brake trim be certain to blue tape the perimeter of the center console and then by placing your fingers within the e-brake bezel at the narrow rear opening you can gently begin the process of lifting it out; BTW it does come straight up even though it would appear that it should do so on an angle and once it begins to lift at the first corner them move to another corner and after massaging it corner by corner it will then slip right out. Installation of it is very easy however making certain that all of the small metal clips are firmly in place.
Prior to beginning the installation of the new e-brake cover per Andrew I rolled the small end over itself and then trimmed the little fold of material within the small end after which I used a bit of silicon spray on the e-brake cover and on the e-brake handle which allowed it to slip on very easy. Now because it is an upholstered piece that has yet to relax it took a few minutes working it over the OEM rubber e-brake cover until I was happy with the look.
Take your time and you will end up with a very crisp looking setup.
Here are a few pictures of the systems as received as well as them integrated in this gal.
If there are any questions please let me know as I remain available to assist.
Takes care
Shadowman
Attachments
Last edited: