Screw size


JCSB

Ex GT Owner
Mark II Lifetime
Can someone tell me what the screw size is for the 2 screws that people are using for attaching the upper racing harness? These are the 2 screws between the upper storage bag mounts. I can get the info later tonight when I go home, but I would like to have it before.

Thanks,
John
 
Anybody?

John
 
sorry John but i am clueless
 
What or who's mounting bar are you using?
If you are using cobrar's belt bar then you use the stock bolts.
 
I'm not using a bar. I am doing another project. I just need to know the the screw size and pitch.
Thanks,

John
 
11mm 1.25mm pitch

Takes care

Shadowman
 
I never knew that the "size" of a screw was so important but rather the quality and/or memory of the screw. Some screws are better than others, but I don't recall a really bad screw. I hope this helps. Nardo :biggrin
 
I never knew that the "size" of a screw was so important but rather the quality and/or memory of the screw. Some screws are better than others, but I don't recall a really bad screw. I hope this helps. Nardo :biggrin

So see, you've learned something. Everything is important in a screw. :rofl

John
 
So see, you've learned something. Everything is important in a screw. :rofl

John

Especially the pitch !!! and occasionally thread protectant ...:biggrin
 
Those screws are 7/16-20..... assuming you're talking about the ones where the harness bars attach.
 
And the number of screws....as he indicated 2 screws. This is especially important if you are referring to the same hole or a different hole where you are screwing. The location or proximity of each screw can be vitally important....sometimes the further apart, the better. However on a different note, 2 screws back to back, whether they are in the same hole or different holes can be a difficult, but pleasurable task. In my younger days we used to share screws, but always try to be first to use a screw whenever possible. :thumbsup
 
An 11MM 1.25 and SAE 7/16 20 bolt are interchangeable.
 
An 11MM 1.25 and SAE 7/16 20 bolt are interchangeable.

The conversion "Master"

Thank you

Shadowman
 
I used the 7/16-20 and it worked fine. :thumbsup I hope to have some pictures next week of everything I've done so far. Shadowman, the 1/4" plate for holding the amp came back from the anodizers and I attached a rubber backing to it so nothing gets rubbed the wrong way. :rofl

John
 
I used the 7/16-20 and it worked fine. :thumbsup I hope to have some pictures next week of everything I've done so far. Shadowman, the 1/4" plate for holding the amp came back from the anodizers and I attached a rubber backing to it so nothing gets rubbed the wrong way. :rofl

John

Well done John

Now I await the "Proof of Life" pictures

Takes care

Shadowman
 
Well done John

Now I await the "Proof of Life" pictures

Takes care

Shadowman

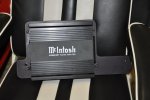
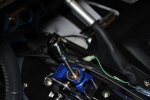
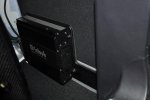
So here are a few pictures of the amp plate. It has high density foam attached to the back to keep from scratching anything. I also attached the gear shift I machined out of titanium with GT engraved on top.

John
 

Attachments

  • DSC_0060r.jpg
    DSC_0060r.jpg
    76.1 KB · Views: 45
  • DSC_0065r.jpg
    DSC_0065r.jpg
    53 KB · Views: 47
  • DSC_0063r.jpg
    DSC_0063r.jpg
    60.4 KB · Views: 47
Last edited by a moderator:
So here are a few pictures of the amp plate. It has high density foam attached to the back to keep from scratching anything. I also attached the gear shift I machined out of titanium with GT engraved on top.

John

Thank you John; you did a wonderful job.

Takes care

Shadowman

BTW your gear shift is wonderful too
 
Last edited by a moderator:
Thanks you set a very high standard. The gear shift knob was counterbored to keep the overall height the same as the original knob. The knob threads were timed so that when fully tightened the GT engraving would be at the right position.

John
 
Thanks you set a very high standard. The gear shift knob was counterbored to keep the overall height the same as the original knob. The knob threads were timed so that when fully tightened the GT engraving would be at the right position.

John

Very interesting you were successful in timing the threads. I've had two or three situtations in some of my designs that I needed to time threads and always had to fine shim to get just right. Once was when I had to screw the pintle on the adjusting nozzle of an ejection seat rocket engine. It was used to vector the thrust to right-up the seat during an unfortunate inverted ejection. We eventually got it to work real good!
 
There are several ways to time threads. We have a customer who requires multiple hydraulic passages to align on assembly. This requires us to time the threads. All our equipment is CNC and timing becomes less of an issue. With that said I can tell you that I cheated on this one. I merely assembled the knob to full torque and marked top dead center. It was then aligned on a CNC mill and the engraving was done. :thumbsup

John