Stock exhaust out through the top?


the Wizard

GT Owner
Jul 16, 2012
414
Los Angeles
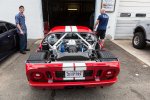
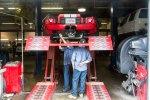
So I'm doing the bumper delete and Kendall's new cat-back exhaust. Started pulling things apart and all is going ok, I guess. But I got to the point were the stock muffler was ready to come out. CNC says to remove the tips, well on the OEM muffler the tips are not removable. Ryan, Kendall's nice son, says just pull the muffler out from the top, even with the clamshell still in place. But, my concern, before I try, is when you tip it forward to pull it out those damn long tips are gonna be a pain???

And if I do pop the clamshell I assume the lifting shocks, whatever, just pry loose?

I'll go search for info here, but thought I'd post it anyway....all comments appreciated. Wait, all CONSTRUCTIVE comments appreciated! Haha.....I already know I look funny...
 
Last edited:

shelbyelite

PERMANENTLY BANNED
May 10, 2007
1
The clamshell is very easy to remove as long as you have two people. Why not just take it off? Be much easier to do the bumper delete kit.
The struts have a metal clip (black) that holds them on. Once you remove the metal clips, they will pop off
 
Last edited:

jbyrnes

FORD GT OWNER
Mark II Lifetime
Jun 13, 2006
224
Louisville CO
I've had the OEM muffler in and out a couple of times (long story). Not only did I find it necessary to remove the clamshell (really a 3 person job - 2 hands on each side and another hand to pull the hinge pins. You'll find that the shell needs to be almost closed to get the pins out. It's easier to leave the pins in and unscrew the lower hinge brackets, but then you'll have to re-align later). I found it necessary to remove the third engine mount (above the transaxel) and let the motor pivot down until the starter contacted the crossmember. And even then it took some coaxing to pivot the muffler out. I sure wish they would have had the tips removable - would have solved all hassles. Use several layers of blue tape on the welded edges of the muffler. You'll see why when you start to twist it out. I recall you'll also want to remove the muffler support bracket that's attached to the rear casting of the transaxel. It's a suprisingly ugly job for as accessible as it looks.
 

the Wizard

GT Owner
Jul 16, 2012
414
Los Angeles
Shelby.....yeah ok, I'll pull it, I didn't see any pins.....I'll look again......

jbyrnes....wow, drop the engine? Gezzzz......Shelby, you lower the engine? Maybe I should just cut the tips off, I mean it doesn't seem likely I'll ever put the stock system back in, and, if I do, maybe removable tips is still the way to go?
 

shelbyelite

PERMANENTLY BANNED
May 10, 2007
1
No, we don't do that and its not that hard at all. My tech Eric will be happy to assist you on the phone if you need help....
 

the Wizard

GT Owner
Jul 16, 2012
414
Los Angeles
OK, you're moral support is much appreciated. I've done a ton of automotive projects, I just don't want to make a mistake on such a beautiful car. Good news is I can really take my time. So tomorrow I'll pull the clamshell, and maybe even the rear fascia. There's a post by Mooney56 with the whole rear end exposed....looks like a very cool way to do the job, and do it right.

Do I remember something about not having to cut a frame horn bolt like the CNC instructions suggest?
 

KJRGT

GT Owner
Mark II Lifetime
May 4, 2006
2,840
SoCal
If Ryan and Kendall say the muffler can come out without removing the clamshell then you might wait to talk to Kendall directly. After speaking with him you may be comfortable giving it a go.
 

shelbyelite

PERMANENTLY BANNED
May 10, 2007
1
Yes it can be done without removal, but honestly its more of a PITA doing that way (in my opinion) and you also run more risk of scratching things. I'm my opinion, the best way to do it is removing both the clamshell and the rear facia.
 

Mooney56

GT Owner
Jan 21, 2012
98
Houston, Texas
If you are doing a bumper delete you need to take the clamshell off anyway. When the bumper comes off the muffler will nearly fall out in your hand. And I didn't have to cut any bolts. The only "trick" was after it all went back together was to loosen the cats and realign everything just to get the exhaust tips right. For those of you in the Houston area the GT will be in the Autorama this weekend. Look in the center of the GRB.
 
Last edited:

the Wizard

GT Owner
Jul 16, 2012
414
Los Angeles
Mooney56.....I don't understand "the muffler will nearly fall out in your hand"? My bumper is off, as are both of the rear perforated panels, and that muffler is certainly still buried in there. Do you mean the rear body panel? Like you did?

The directions say to cut the two lower horn bolts as they might not come out due to hitting the catalytic converter. But I seem to remember someone saying something about finding a better way that those bolts don't have to be cut?
 

Mooney56

GT Owner
Jan 21, 2012
98
Houston, Texas
Yeah, I took the whole rear panel off and it was pretty easy. Just a bunch of clips and screws. I don't think you can mount the lower filler panel without getting the rrear panel off the car. Or to be more clear, you could get it done with the rear panel on the car but I needed to do a little adjusting to the filler panel to make it perfect before it was painted. I didn't need to cut the bolts because by loosening the doughnut on the converter it gave enough room for the bolt to slide out. Enjoy the project. I think it was a great modification.
 

MAD IN NC

Proud Owner/ BOD blah bla
Mark IV Lifetime
Feb 14, 2006
4,211
North Carolina
Guys, use the search engine on the site and you will find lots of threads on this task. I've done three upgrades without removing the clamshell once. Takes ~ 2 to 3 hr's.... Kendall and Shadowman both gave excellent write ups. It's all here and been done already - and no big deal. Threads go back to 2006.............. been there - done that


http://www.fordgtforum.com/forums/s...o-install-a-Heffner&highlight=muffler+removal
 

Xcentric

GT Owner
Mark II Lifetime
Jul 9, 2012
5,213
Myakka City, Florida
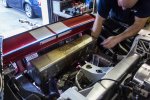
The clamshell comes off so easily, I don't know why you wouldn't remove it, unless you don't have a couple of helpers. Even so, the stock muffler took a lot of wiggling to get the tips to clear. The transaxle mount bolt comes out, which is supposed to let the transaxle drop enough for clearance. On mine, however, the transaxle barely dropped 1/4" before it was resting on the lower crossmember. It was a bit of a PITA.

I'm convinced that clearances must vary slightly on our cars, because just another 1/4" clearance would have made removal easy.

With two calm and steady helpers, the clamshell went on easily.

p1101961506-5.jpg

p1101981476-5.jpg

p1101987446-5.jpg

p1101987576-5.jpg

p1102003044-5.jpg
 
Last edited:

Mooney56

GT Owner
Jan 21, 2012
98
Houston, Texas
IMG_0985.jpg

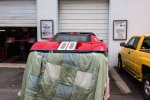
Remove two pins, pop off two struts, have two friends and spare two minutes. Done.

PS. If you buy the foam insulation from Home Depot for plumbing pipes -- the kind with the slit down the side -- you can slide it over the front and rear edge of the clamshell and you don't have to worry about a scratch. Also the clamshell will stand up on its forward edge.
 

nota4re

GT Owner
Mark IV Lifetime
Le Mans 2010 Supporter
Feb 15, 2006
4,196
Well, to each his own. We have probably done 100 OEM exhaust removals - without removing the clamshell. There's just no need. If you want to remove the clamshell, you'll need 2 people (3 is MUCH better) for sure and if you have two people, you can get the OEM exhaust out without a lot of fuss.... but it is heavy! In short, with the clamshell removed the lifting becomes easier because you are better positioned. My view has always been that there's more risk and hassle in removing, storing, and re-instaling a clamshell and it's just not worth it for a simple exhaust install. Like everything else, it just takes experience. Shelby's guys or us get also get a clamshell on/off pretty darn quick but for the first timers, there's going to be some foul language involved. If you think those pins just slide out, you are mistaken.

Here's a re-cap of our steps:

1. Make sure BOTH rear black screens are removed as well as the bumper and the airbox.
2. Un-bolt the exhaust and manuever the strap and transaxle brackets out of your way.
3. Place a thick moving blanket or two over the top back half of the engine and rails.
4. One person, "the lifter" on the driver's side and another person on the passenger side.
5. The muffler needs to rotate clockwise (from driver's side perspective), lift, and shift a couple of inches toward driver's side.... simultaneously.
6. The muffler can be placed on top of the moving blanket while passenger side helper comes around.
7. Lift muffler out of engine bay.

Some MYTHS:

1. The clamshell will NOT help removal clearances. The muffler is tight because of the rear valence - NOT the clamshell. (Step 5 is the same with our without the clamshell as you are trying to clear the valence.)
2. The clamshell does NOT need to be removed for the RBD install.

Obviously, I could not care less if you remove the clamshell or not. It WILL make the lifting easier, so you may prefer this.
 
Last edited:

beckertb

GT Owner
Nov 29, 2006
509
Beaumont, TX
Well, to each his own. We have probably done 100 OEM exhaust removals - without removing the clamshell. There's just no need. If you want to remove the clamshell, you'll need 2 people (3 is MUCH better) for sure and if you have two people, you can get the OEM exhaust out without a lot of fuss.... but it is heavy! In short, with the clamshell removed the lifting becomes easier because you are better positioned. My view has always been that there's more risk and hassle in removing, storing, and re-instaling a clamshell and it's just not worth it for a simple exhaust install. Like everything else, it just takes experience. Shelby's guys or us get also get a clamshell on/off pretty darn quick but for the first timers, there's going to be some foul language involved. If you think those pins just slide out, you are mistaken.

Here's a re-cap of our steps:

1. Make sure BOTH rear black screens are removed as well as the bumper and the airbox.
2. Un-bolt the exhaust and manuever the strap and transaxle brackets out of your way.
3. Place a thick moving blanket or two over the top back half of the engine and rails.
4. One person, "the lifter" on the driver's side and another person on the passenger side.
5. The muffler needs to rotate clockwise (from driver's side perspective), lift, and shift a couple of inches toward driver's side.... simultaneously.
6. The muffler can be placed on top of the moving blanket while passenger side helper comes around.
7. Lift muffler out of engine bay.

Some MYTHS:

1. The clamshell will NOT help removal clearances. The muffler is tight because of the rear valence - NOT the clamshell. (Step 5 is the same with our without the clamshell as you are trying to clear the valence.)
2. The clamshell does NOT need to be removed for the RBD install.

Obviously, I could not care less if you remove the clamshell or not. It WILL make the lifting easier, so you may prefer this.

I did exactly this. It was a pain the ass to "negotiate" the muffler out and a pain to unbolt and bolt all of the bolts in locations that were difficult to reach but ultimately doable without any damage. If I had to do it again, I would drop it off at cooltech and pay to have it done!
ben
 

Xcentric

GT Owner
Mark II Lifetime
Jul 9, 2012
5,213
Myakka City, Florida
Maybe I should just cut the tips off...

I thought of doing that, but there is a market for used OEM mufflers. A new one lists for >$2K. Seems a shame to ruin the part if it still has some life left.
 

Xcentric

GT Owner
Mark II Lifetime
Jul 9, 2012
5,213
Myakka City, Florida
The only "trick" was after it all went back together was to loosen the cats and realign everything just to get the exhaust tips right.

Are you saying there is some play in the cat mounting brackets? We couldn't get my Borla tips exactly centered. They are a little below center. Would loosening the cat brackets allow some upward adjustment?
 

nota4re

GT Owner
Mark IV Lifetime
Le Mans 2010 Supporter
Feb 15, 2006
4,196
Are you saying there is some play in the cat mounting brackets?

Oh, absolutely! You need to loosen the "ball flanges" where the front of the CATs attach to the manifolds. (Use a shallow 15mm socket on a 1/2 ratchet to get the top nut on each side and then use an extension with a universal joint to get the bottom nut on each side - NOT difficult.) With these flanges loose, you can freely move the entire exhaust around within the limit of the slotted mounts in the rear. These ball flanges are the last thing to be tightened after you are satisfied with the alignment.

Note: Because of the proximity of the exhaust to the starter and positive battery cable, we would recommend disconnecting the negative terminal at the battery BEFORE loosening up these ball flanges.
 

beckertb

GT Owner
Nov 29, 2006
509
Beaumont, TX
Does this allow for forward/rearward motion as well? With the installation of m stillen h-pipe, the tips are too far inward..........

thanks
ben